 |
| Helpful Tips for Dash Cam Installation
Installing a dash cam doesn’t have to be difficult. Simply connecting it through a car’s 12V socket can provide power to use your dash cam without having to hardwire the camera through your vehicle’s fuse box. Some vehicles even have built-in USB ports that can provide enough power to operate a dash cam, depending on what type of power cables they come with.
If you’re asking yourself whether you can install a dash cam without professional help, the answer is yes! The simplest process doesn’t even require tools, so follow along as we explain how a standard dash cam setup works or what to do next if you’re considering hardwiring your camera.
Standard Dash Cam Installation and Setup
Once you purchase your dash cam, you should have all the components required for a standard install. The most common solution is plugging the dash cam into your car’s 12V socket or USB port for power. Some benefits of this method include the following:
- You don’t need to worry about your dash cam’s battery life since it’ll have power whenever the vehicle is on and will power off when your car turns off.
- Most dash cams start recording as soon as they have power, so the moment you turn on your vehicle, your camera will automatically begin capturing your surroundings from your parking spot to your end destination.
- Make sure your dash cam comes with continuous loop recording so that it will record over the oldest video files and ensure you don’t ever stop recording because you’ve run out of room with the local SD card storage.
- You don’t need to worry about draining your car battery since vehicles today stop sending power to the 12V socket once they’re turned off – even if you don’t unplug what’s in the socket.
- Many dash cams come with long power cables, meaning that you should be able to hide your dash cam wires easily enough, so they don’t dangle from your windshield to your 12V socket.
Where to Mount Your Dash Cam
Next, it’s time to position your dash cam correctly to maximize its field of view and to make sure you’re abiding by state laws. Typically, the best place to mount your dash cam is on the passenger side of the rear-view mirror or right behind it, if it’ll fit. The higher up your camera, the better view it can capture of the road, surroundings, and potential hazards. You also want to make sure it’s not obstructing the driver’s view.
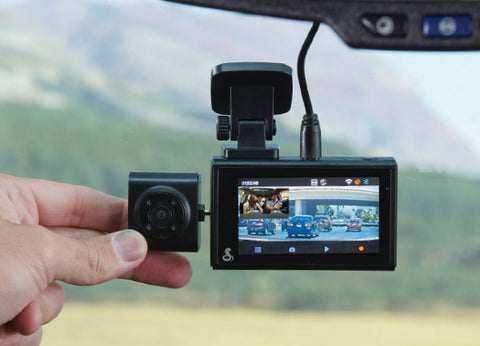
One thing to consider is if your dash cam comes included with a display screen. Some dash cams allow you to turn the screen on or off, but if you want the screen on, you’ll want to position the dash cam so that you can see the screen and be able to navigate through menu settings. If your dash cam doesn’t come equipped with a screen or you will keep the screen off, then placing it on the passenger side of the rear-view mirror is an optimal location.

Since some states have different laws regarding where you can place your dash cam, be sure to check the most updated rules so you’re not caught in the wrong when trying to drive smarter. Some loose standards prohibit anything larger than 5 inches to be mounted on the driver side of the windshield and 7 inches on the passenger side.
Just because some states have rules against mounting a dash cam to your windshield, doesn’t mean there aren’t other good dash cam installation positions. Consider placing your dash cam on the car’s dashboard, since that still allows the camera to capture a view of the road while not obstructing driver views.
How to Install a Rear Dash Cam
If you’re installing both a front and rear dash cam, the type of vehicle you have can make the process simple or a bit more difficult. For sedans, coupes, and some trucks, your back windscreen won’t be moving, but if you drive a hatchback, SUV, or van, the rear window will be lifting up and down. If you’re happy with a small power cable dangling between the headliner and liftgate, simply leave enough of the power cable outside of the headliner to allow your dash cam to stay attached to its power supply cord when the back door is opened.
The best place for a rear dash cam is to position it high and in the middle of the rear windscreen, right underneath the top rear brake light. Run your rear dash cam’s power cables along the side of the headliner (see below for tips on how to hide the cable) until you reach your front mount dash cam, which is where you’ll plug the rear dash cam connecting power cord. This means you’ll only have one power cord going to your 12V socket.
How to Hide Dash Cam Power Cables
Once your dash cam is positioned in place on the windshield or dashboard, it’s time to hide unsightly power cables. This can be easily done by unplugging your dash cam from the 12V socket and finding the closest interior panel to the placement of your camera.

For windshield placement, this will most likely mean you start by tucking your cable under the top interior panel above your windscreen. You’ll then want to run it along the edge, being careful to gently push your cable underneath the panels as you move across the top, down the side, across the top of the footwell, and then around the side of the footwell, ready to be plugged into the socket.
For dashboard placement, you’ll likely be able to run your wire along the top of your dashboard near your windshield, down the side, across the top of the footwell, and back to your 12V socket. This way you won’t have a cable running down the center of your dashboard.
Once your dash cam is installed and your cables are hidden, go ahead and plug in your dash cam and start up your vehicle! Make sure your camera is angled appropriately to capture a full road view. If you’ve installed a Cobra dash cam then you’ll also have the benefit of the Drive Smarter app. Download the app on your phone and create an account. Once you power up your Cobra dash cam, you can connect your camera with the app and you’ll be ready to start your journey towards driving smarter and safer.
Hardwiring Your Dash Cam
Hardwiring a dash cam does require some tools and a bit of comfort working with wiring and electricity, but with the right guidance, it is possible to hardwire a dash cam yourself. There are also some benefits to hardwiring, one of those being the ability to always have power to your dash cam, regardless if the car is on or off. This enables your dash cam to utilize security features such as parking mode while running off the power provided by your vehicle, which can be useful if you want to keep an eye on your parked car day or night.
Here are some of the initial steps you’ll need to take when hardwiring a dash cam:
First, locate your vehicle’s fuse box. This is where you’ll be running the dash cam’s power cable to, and most vehicles have one that's easily accessible underneath the dashboard. If you can’t find your fuse box, consult the owner's manual for your vehicle. In most cases, you’ll still need to run your power cable from the dash cam underneath the headliner and down the side of the A-panel in order to get to the fuse box. Once you’ve completed this, you may need a hardwire kit to assist you in the next steps.
Most vehicles will have different types of fuses, some of which have power at all times, even if the vehicle is off, and some that turn off automatically with the vehicle. You can test which fuses are hot by using a simple circuit tester. There are plenty of resources and videos on how to complete the installation process depending on what dash cam you have.
How Much Does It Cost to Get a Dash Cam Installed?
If you want your dash cam to be hardwired but don’t feel confident going through the steps on your own, consider having the job done by professionals. Hardwire dash cam installation can vary by shop location and who is carrying out the task so it’s best to call around for a few quotes before committing.
Regardless of whether you choose a simple dash cam installation or want to learn how to install a dash cam with a hardwire setup, dash cams have a range of benefits that can help you drive smarter. Pairing a dash cam with a radar detector creates the ultimate driver alert system for a safe driving experience for both new and experienced drivers.